

HDR, or High Dynamic Range, is the Holy Grail of photography. We talked earlier about how every professional photographer seems to have an opinion about this type of photographic practice and why non-professionals are totally in love with it. While we let them further debate on this issue, let’s investigate what HDR isn’t, rather than is. First of all, it’s certainly not a safety net nor is it a way of hiding photographic mistakes. If you have a crocked image, out of focus or simply bad, HDR won’t help. Actually, it might make it worse. Another thing that HDR should not do is turn reality into a fantasy world, where colors rule the game. The purpose is to blend both the shadows and the highlights of a scene into a single photo without making the effect too obvious. With this in mind, let’s see how you can fake this effect with just one photo and get a decent result.
Why would you fake a HDR?
A brief recap on how to get a HDR photo: pick a subject, shoot at least three consecutive images of it (with different levels of exposure), and then use a dedicated software to combine them into a single photo. The catch is that, in order to get three separate photos with three levels of exposure, we must have a perfectly still subject. And while that’s negotiable in the case of real estate, it’s never realistic with a living subject. So, if you don’t have a camera that allows you to manually set the exposure or something keeps moving in your scene, don’t worry! We’re going to show you how to get a HDR effect without enduring the whole time-consuming process.
Juggle with Highlights and Shadows
There are a number of more or less efficient ways to fake this effect. Our technique “juggles” with the parameters that define a HDR, namely Highlights/ Shadows. And by “lights and shadows” we are referring to the color space that emphasizes them, namely the LAB.
1. Change the color space
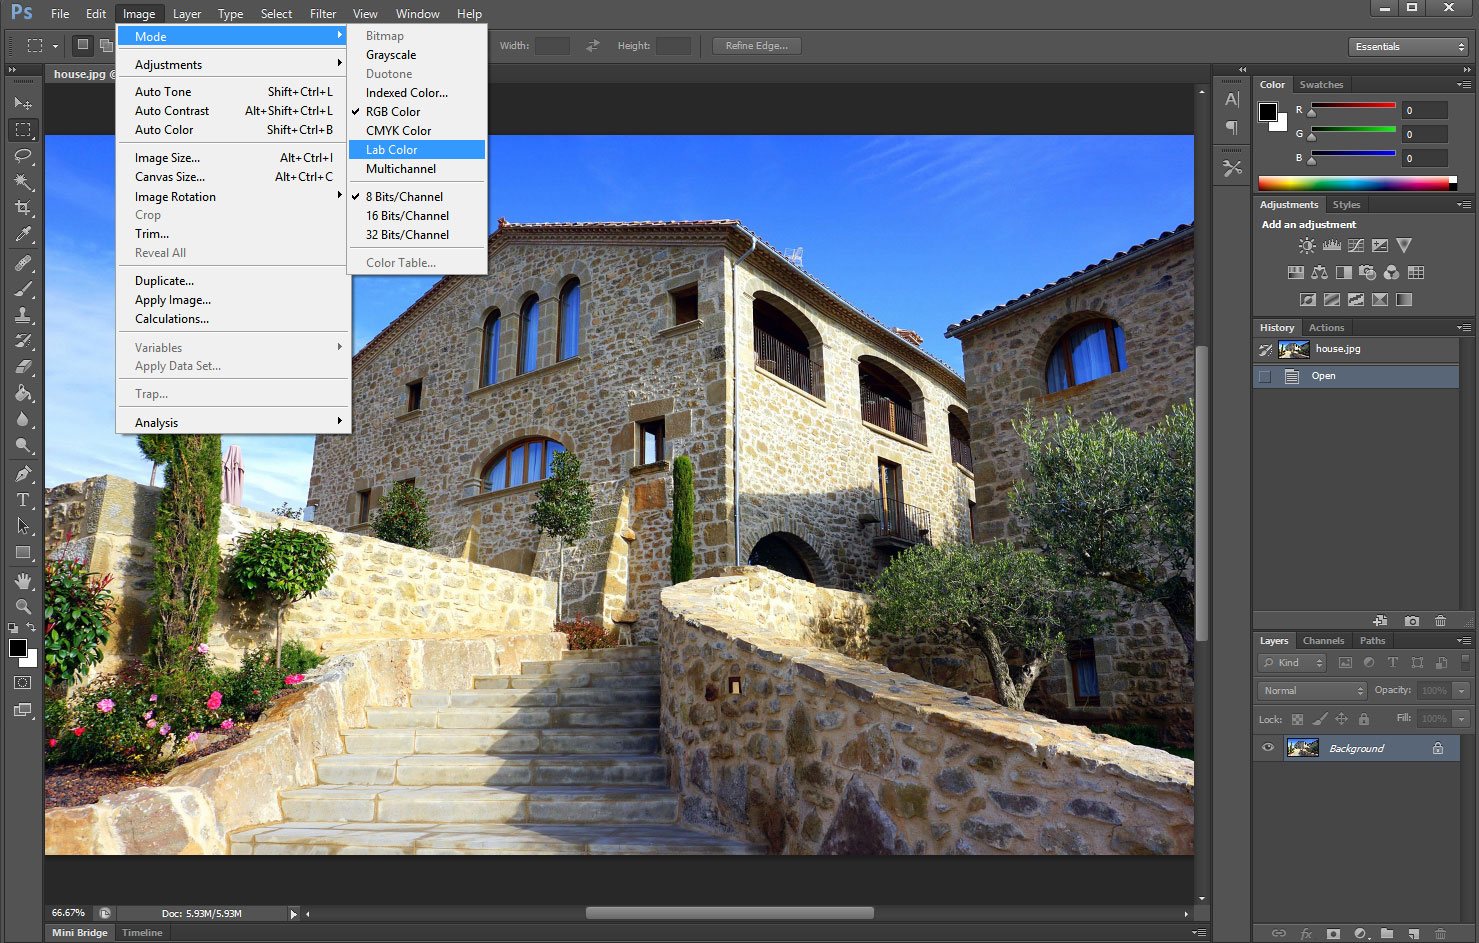
Choose an image – .JPG format will do just fine. Open it and change the color space from RGB to LAB (Image-Mode-LAB color). If you want a before-and-after comparison, duplicate the layer, then hide it. Now, turn the top layer into a Smart Object. Simply right-click on it and choose Convert to smart object.
2. Play with the dark and light areas
Go to Adjustment – Shadows / Highlights. Keep in mind that there are no default values for this tool; each image is different, both in terms of luminosity and quality. The more precarious an image is, the more artifacts we’ll end up with. In our case, the Shadows values are 70% and Highlights 45% but we could very well lower them a bit. Pay close attention to all areas of your image and try not to lose important details on the way. Do not close the tool just yet.
3. Parameters: description and functionality
Let’s tackle the difficult part now. Check the Show more options box in the lower left corner to get the controls you need to make this adjustment work . Here’s a short description of their functionality:
Tonal Width: increases or reduces the range of tones that will be affected by the tool. A low Tonal Width value for the shadows will include only the darkest of pixels while a low Tonal Width value for the highlights will include only the brightest of pixels.
Radius: describes the contaminated area around each affected pixel. Think of a stone thrown into the water – Radius describes the maximum radius of rings that are formed.
Color Correction: applies a color correction to the affected areas. Given that we are working in the LAB color space, this option is redundant.
Midtone Contrast: adjusts the contrast between the pixels of the affected areas.
Black / White Clip: allows you to set new values for absolute white and black.
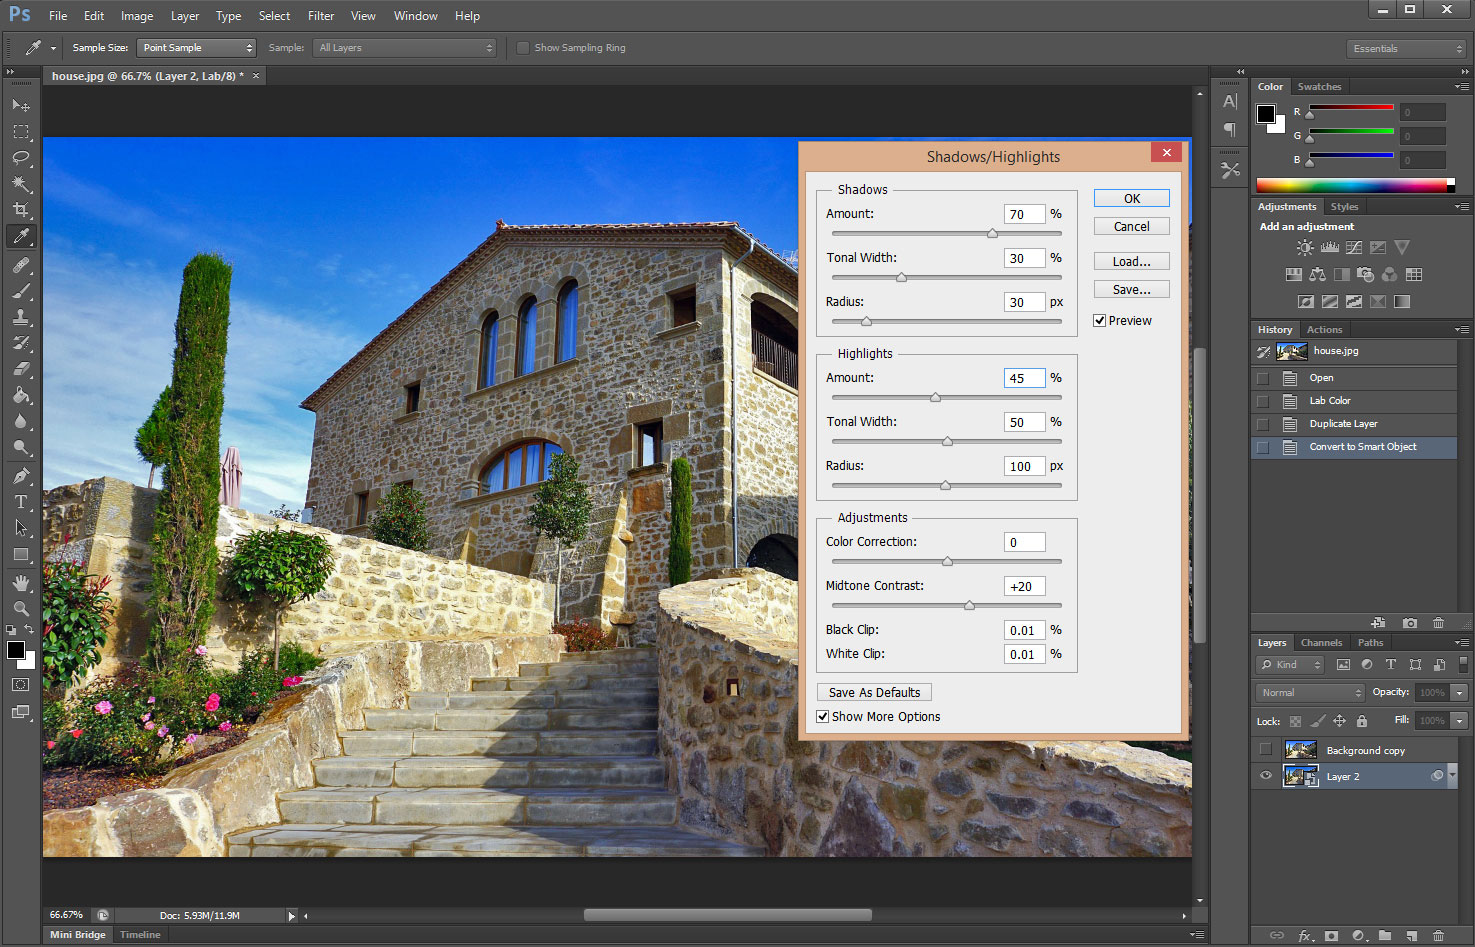
In our case, the values applied are as follows: Shadows – Tonal Width: 30%, Radius: 30px; Highlights – Tonal Width: 45%, Radius: 100px. Our aim was also to keep a good contrast of the image so we set the Midtone Contrast to +20. Hit the OK button and apply your values. Save the photo and you’re done!
Of course, there are tons of other ways to turn a plain-looking photo into a vibrant HDR, albeit a fake one, but this is the easiest of them all. No useless layers, no complicated adjustments or calculations – just playing around with the dark and light areas of your image. Does it do the trick? Try it and see for yourself.
[…] and provides an array of tools to perfect it. Next time, we’ll talk about how to get a HDR effect with just one photo. Stay tuned for […]